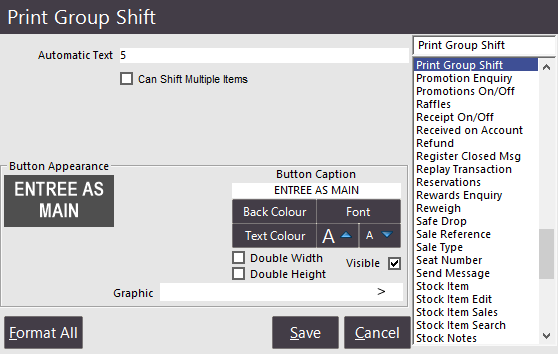
Go to Setup > POS Screen > POS Screen Setup > Layouts > Buttons.
It is possible to change an item’s Print Group during a sale by pressing a Print Group Shift function button. This will give you the flexibility to ensure the item prints in the correct area on the docket. Entering a number of the specific print group into the Automatic Text field will shift the item to that print group. This function has some advanced properties when used in conjunction with the Hold Print function without the Restaurant Module. For more information on using this feature in these instances, please refer to the Hold Print Function user guide.
You will need to create a Table Button which links to the Table Map/s. Enter the Table Map Code that corresponds to the Table Map you want to assign. If this field is set to 0, it will use the Table Map specified in Setup > POS Terminals > Miscellaneous > General > Default Table Map. This allows you to have one Table Map button on a POS screen layout that is shared by two or more terminals, each of which can use a different default Table Map.
If you choose to use position or seat numbers you will need to create a button that allocates seat numbers to meals.
If you choose to require your staff to enter a seat number before each sale starts, you may need to create a button that allows you to bypass the requirement. This can be used for those occasions that a seat number is not necessary. You will need to select Seat Number from the function list, and enter NOSEAT into the Automatic Text field.
If a meal is to be shared among guests at a table but you require seats to be entered, you can enter the seat numbers that are going to share the meal against that item only.
This function will automatically insert a Course Separator line between courses instead of using Print Groups on Kitchen Printing. This only works when using the option Group Instructions by Seat.